This time around I’ve been tasked with using Photoshop to adapt and manipulate an image to make an original piece. Thankfully I have at least a surface level amount of experience and knowledge using Photoshop so this will be an experimental process and yield something special.
Step 1
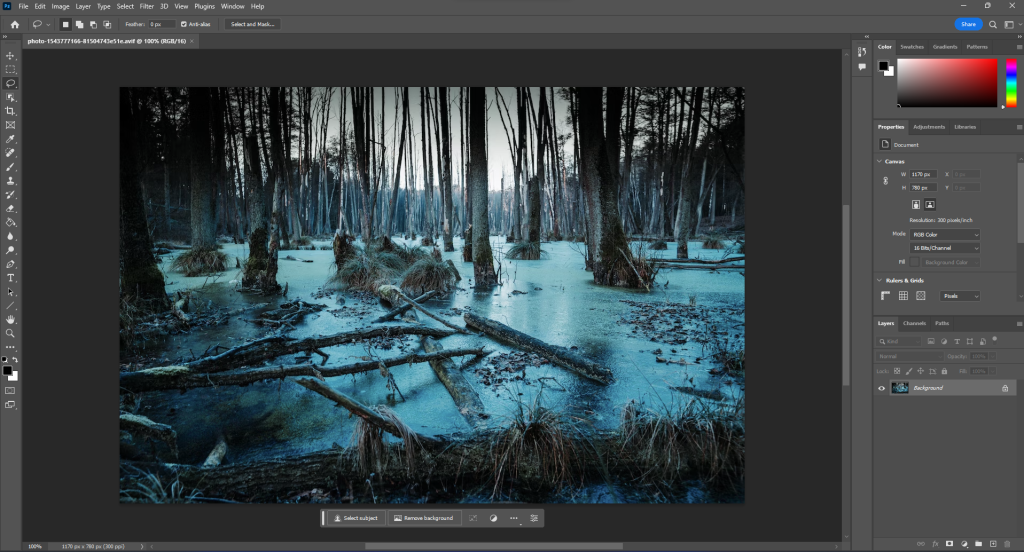
The theme I decided to stick with is Dark Fantasy, the reason for this is I’m a fan of bleak and run down environments aswell as their inhabitants. And so I found an image of a desolate swamp that has frozen over to serve as the backbone of my product.
Step 2
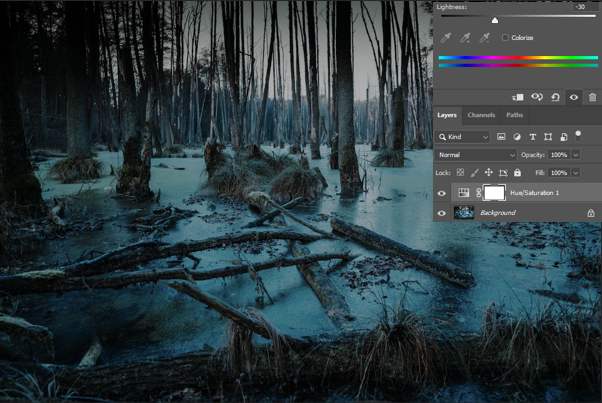
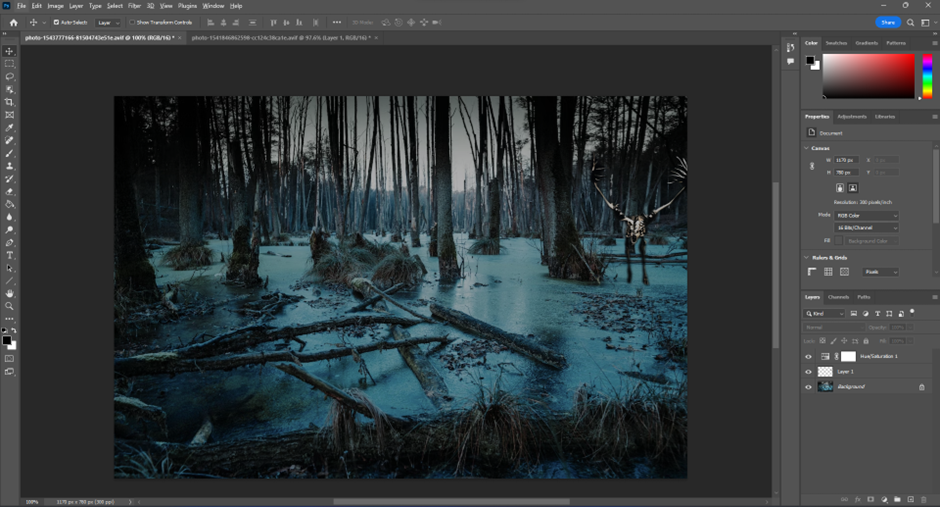
Shortly after porting the photo over I realised that it’s far too bright for the theme I’m trying to convey, therefore I used the Hue/Saturation tool to darken the environment in preparation for what I’m going to add.
Step 3
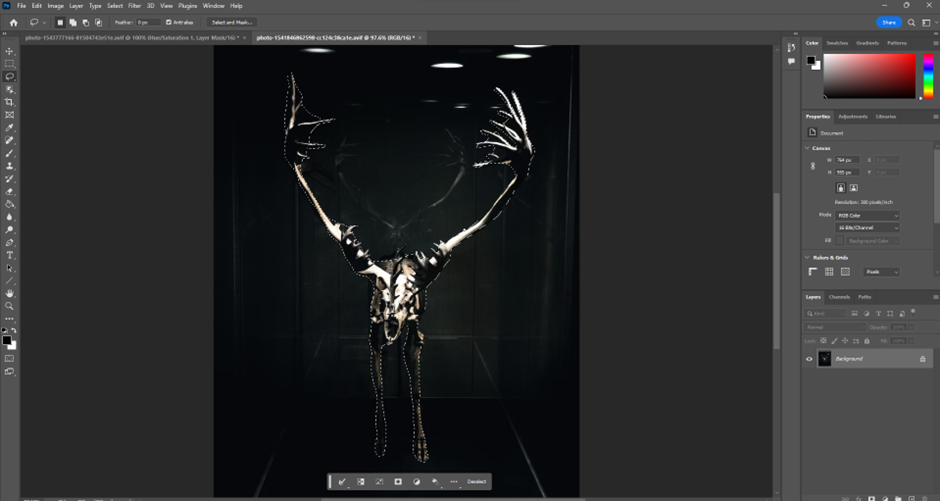
Next I took an image of a skeletal deer that was being shown in a glass case from the front angle and ported it over to Photoshop to then use the Lasso tool to carefully trim out of the image and copy it onto a new layer, removing all unwanted background.
Step 4
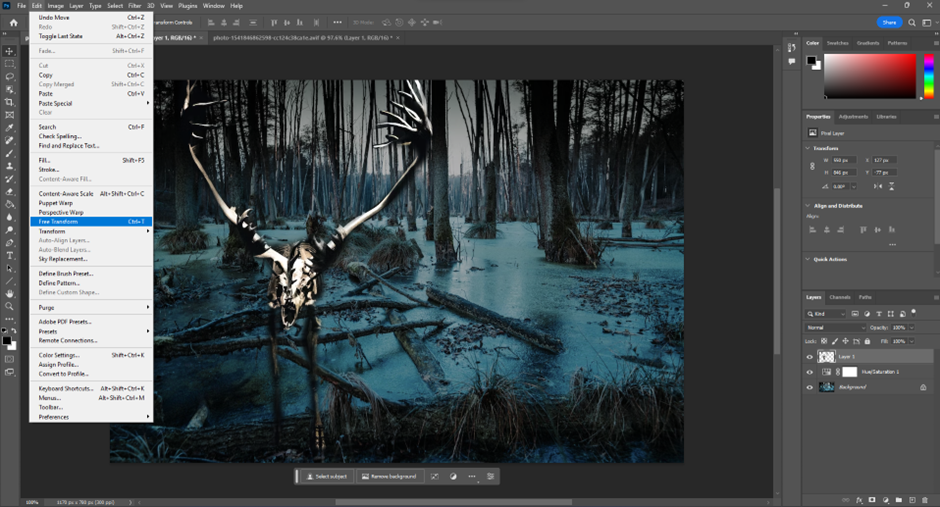
After copying the trimmed layer I then moved back over to my project and pasted it within, using the Free Transform tool to size it down and shift it’s position to my liking. Once I’d done this I made sure to budge up the ‘Hue/Saturation’ layer to the front to ensure the newly added images follow the same darkness I configured at the start.
Step 5
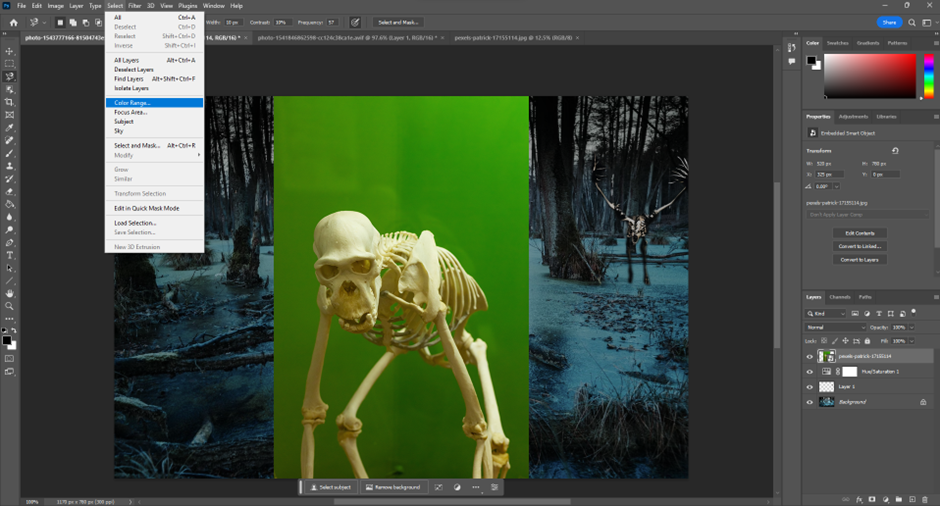
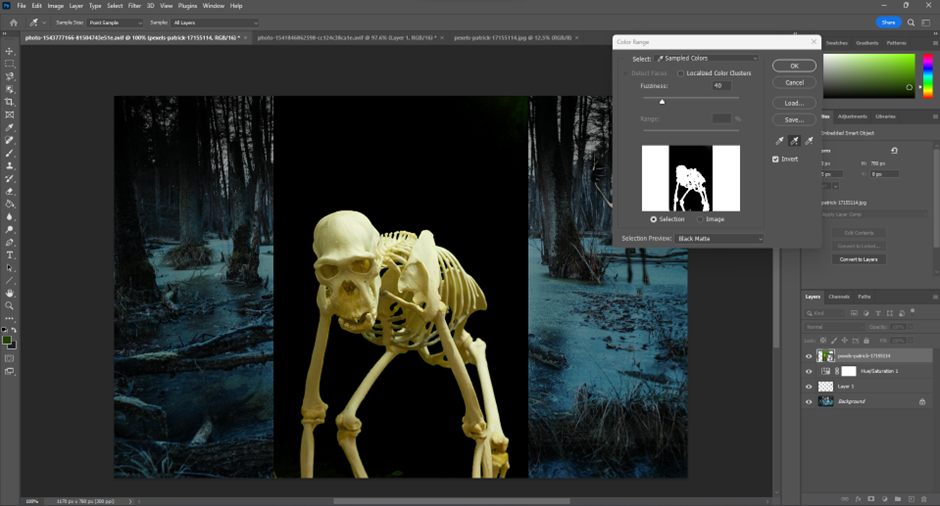
I still felt that the image was rather empty despite the new addition, therefore I managed to get a hold of another photo to throw into the mix. However this would require a different method that proves for a move accurate trim and cut around edges. What I did here was essentially green screen the massive skeleton rather than cut around it with the lasso, instead using the colour range tool to single out the greens behind it.
Step 6
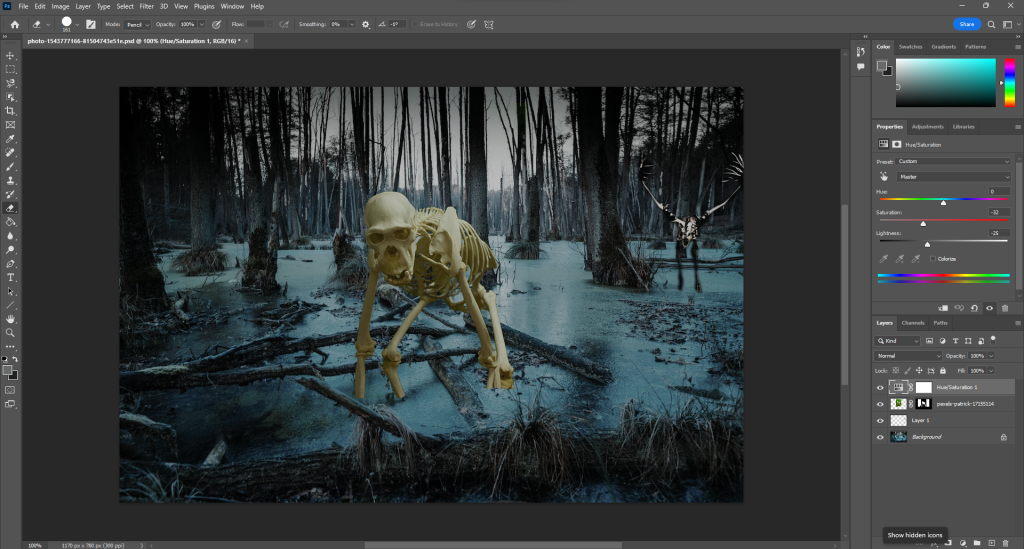
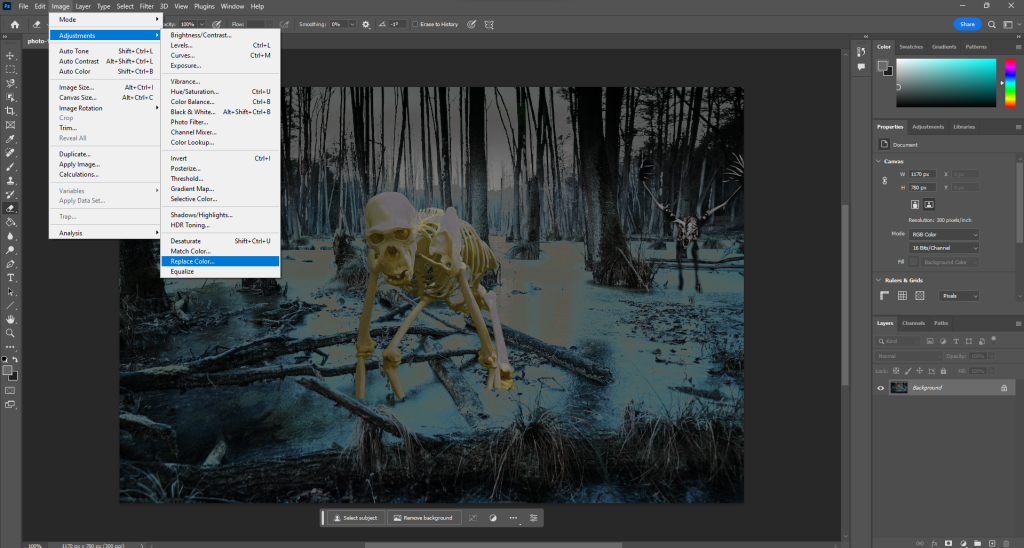
With the skeleton in place, I erased the feet to give the idea that he is still bound in the ice beneath him. Despite my changes to do the hue/saturation I feel that a colour replacement is needed to darken the sky further. And so, I used the ‘Replace Colour’ tool, selected the backdrop and lighting; then slid it down to a much darker setting that then effect the entire image.
Conclusion and Reflection
Final Product
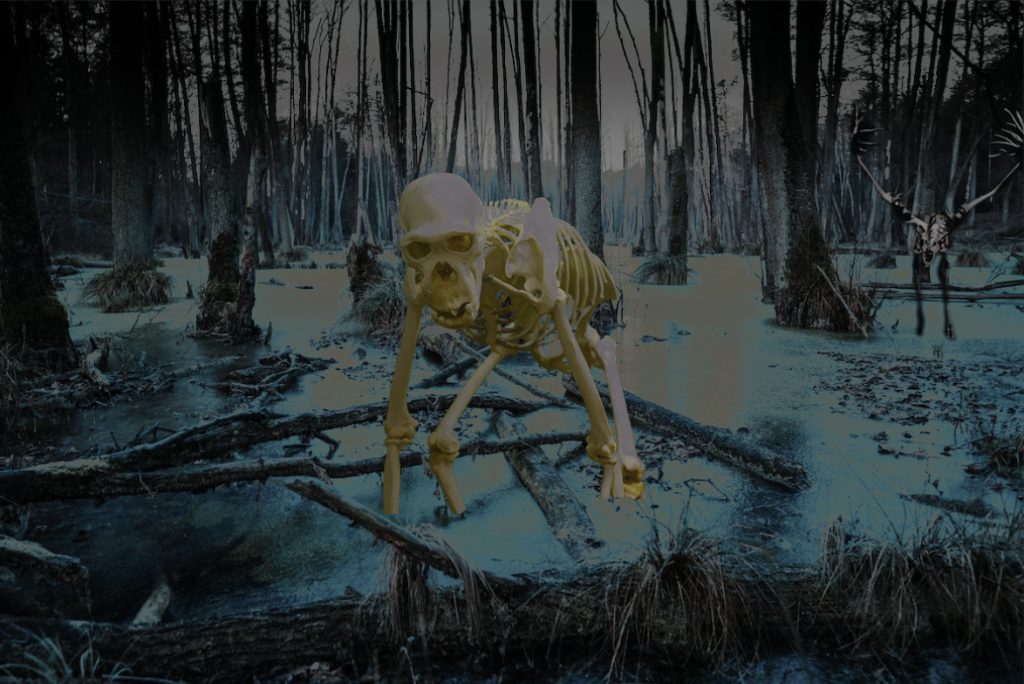
After running into the roadblock of uncertainty on what to add next I decided to conclude the project. Although there is still areas I’d like to improve on such as trimming to get a more accurate cutout from other images to seamlessly blend them in, that’s one thing I’m not confident about. On top of this I found myself rather limited due to the usage of only free images, something I must get used to in the future. Overall I’m satisfied with what’s came out of this, with many improvements to be made in the future.